This article is part 3 of 3 part series:
- Single Sign-On Using SAML
- Single sign-On Using Active Directory
- Single sign-On Using OpenID Connect
Quick links
Introduction
Single sign-on has become a web standard, allowing users to log in to multiple applications using a single set of credentials.
In this article we will use OpenID Connect as the SSO method, and Okta as the idP (Identity Provider) to authorize our Okta users to view certain Opensearch Dashboards without having to maintain two different user lists, or making users manage a set of dedicated Opensearch credentials.
- User login using Okta credentials.
- Depending on the user group, a different role mapping will be applied.
- Each Okta group will be mapped to an Opensearch role with specific permissions.
- Authorized Dashboards are returned to the user.
How to implement SAML SSO Using OKTA idP
1. Create an OKTA account
Create a free Okta trial here: https://www.okta.com/free-trial/

2. Create user groups
For this example, we will create 2 Okta groups to show users how to map these roles to OpenSearch user roles and tenants. In the Okta admin panel go to Directory -> Groups and then create the okta_dashboards_admin and okta_dashboards_user.

Don’t forget to assign your Group to the Application.

3. Create role mappings in OpenSearch
Since only one login method can be active at once, ensure the right roles to Okta users are assigned, because after activating SAML we can no longer login using the default admin user.
To do this, locate the roles you want to assign to your OKTA users and add that group to the mapped users list.
To the okta_dashboards_admin users we will assign the allow_all role, while the okta_dashboards_users will be given the kibana_user role.
Go to Security -> Roles -> <name_of_the_role>, in the Mapped users section select “Manage Mapping.”
To the Backend roles list add the name of the Okta group you want to use.


Repeat each step for each Okta group.
3. Create an App for OpenSearch Dashboards
Pay special attention when filling this out, it needs to match the configuration we will later create in OpenSearch.
Go to Applications -> Create App Integration.

In the Sign-in method box select “OpenID Connect” and in the Application type section select “Web application.”

Under Application, choose any display name you want, add a logo (optional), and click Next.
Configure the following settings:
Sign-in redirect URIs: http://<dashboards_host>/auth/openid/login
Sign-out redirect URIs: http://<dashboards_host>
Save, and then add:
Client ID
Client Secret

Go to the Sign On tab, and set the Groups Claim Type to “Filter” and the Groups Claim Filter to regex match and value of .* to capture all user groups. Here, use any pattern you want to only pass along only the user groups you want.

Go back to Applications and Assign the Groups you created at the beginning.

4. Enable OpenID Connect SSO in OpenSearch
You must modify 2 files:
/usr/share/opensearch/config/opensearch-security/config.yml
_meta:
 type: "config"
 config_version: 2
config:
 dynamic:
   authc:
     basic_internal_auth_domain:
       http_enabled: true
       transport_enabled: true
       order: 0
       http_authenticator:
         type: basic
         challenge: false
       authentication_backend:
         type: internal
     openid_auth_domain:
       http_enabled: true
       transport_enabled: true
       order: 1
       http_authenticator:
         type: openid
         challenge: false
         config:
           subject_key: preferred_username
           roles_key: groups
           openid_connect_url: https://<okta.domain>/.well-known/openid-configuration
       authentication_backend:
         type: noop
Fill “openid_connect_url” with your Okta domain.
Because OpenSearch Dashboards require that the internal OpenSearch Dashboards server user can authenticate through HTTP basic authentication, we must configure two authentication domains. For OpenID Connect, the HTTP basic domain must first be placed in the chain. Make sure the challenge flag is set to false.
/usr/share/opensearch-dashboards/config/opensearch_dashboards.yml
For Dashboards to use OpenID Connect SSO, add the following to your opensearch_dashboards.yml file
opensearch_security.auth.type: "openid"
opensearch_security.openid.connect_url: "https://<your_domain>.okta.com/.well-known/openid-configuration"
opensearch_security.openid.client_id: "your_client_id"
opensearch_security.openid.client_secret: "your_client_secret"
opensearch.requestHeadersWhitelist: [authorization, securitytenant]
opensearch.ssl.verificationMode: none
opensearch_security.openid.scope: "openid profile email address phone groups"
5. Apply settings
To apply settings use the securityadmin.sh script:
a. Apply changes with securityadmin.sh – OpenSearch documentation
Example:
Cd to the /usr/share/opensearch/plugins/opensearch-security/tools directory and run:
./securityadmin.sh -cd ../../../config/opensearch-security/ -icl -nhnv -cacert ../../../config/root-ca.pem -cert ../../../config/kirk.pem -key ../../../config/kirk-key.pem
b. Restart OpenSearch
Now when users access their OpenSearch Dashboards URL, they’ll see the Okta Login page.

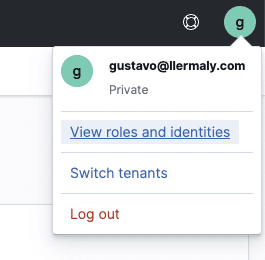
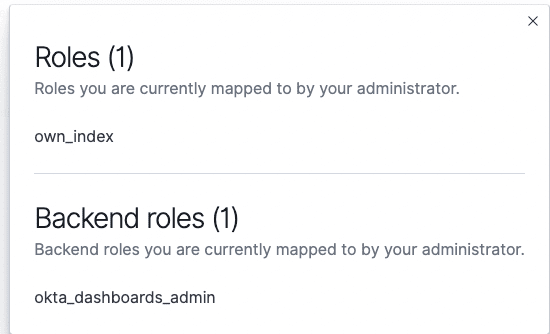
After login, we should see the following under “view roles and identities”.


Conclusion
Setting up SSO in OpenSearch allows users to have the same users and permissions across applications hassle-free. Once Okta Groups are defined, we can map these Groups into existent OpenSearch roles.


