Quick links
Introduction
Reporting allows users to generate useful data summarizations in the shape of PNG images of Dashboards, CSVs with Discovery result content, to entire PDF reports of certain Notebooks.
Reporting plugin installation
To use OpenSearch’s reporting functionality, users need to install the reporting plugin on all OpenSearch nodes.
bin/opensearch-plugin install opensearch-reports-scheduler
Generating reports
There are two ways users can generate reports:
- From OpenSearch dashboards directly, using the Reporting Plugin
- Using the Reporting CLI (available from version 2.5)
Let’s explore each of these options.
Generating reports using Opensearch Dashboards

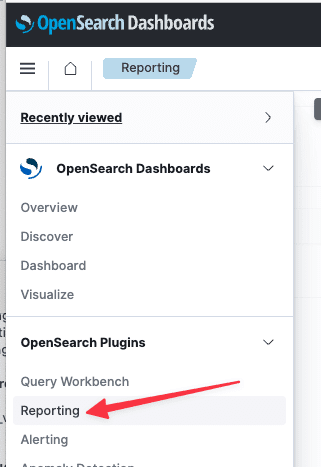
Triggering reports from the Dashboard itself is the simplest way to receive reports on demand right from the browser. Click on reporting -> Create report.
From here we can see the reports generated from the Dashboards/Notebooks/Discovery section, but also establish Report definitions to automate the generation of reports:
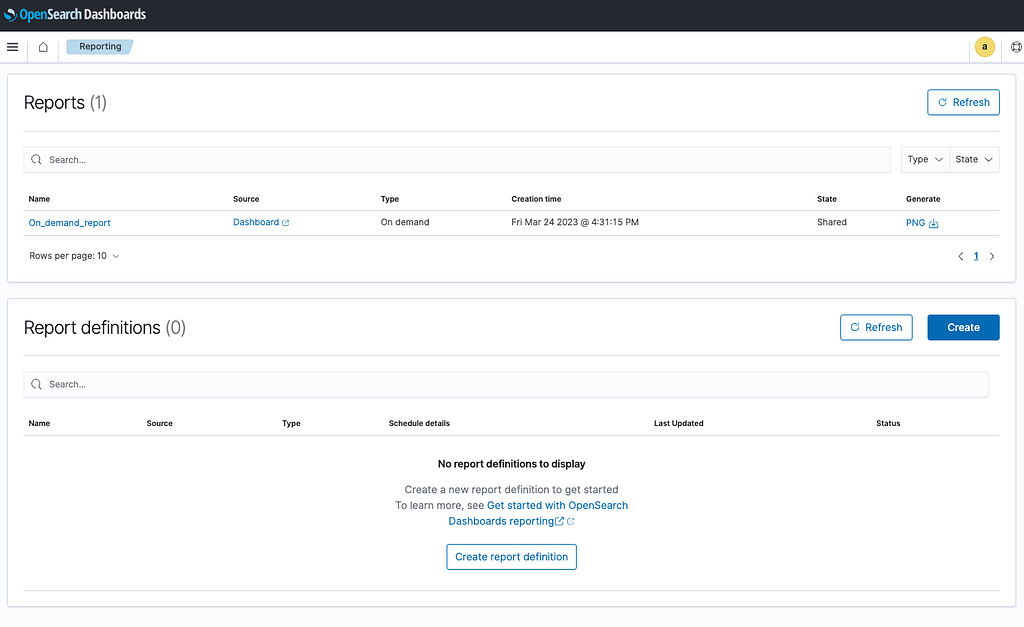
Click “Create” to start configuring the report definition.
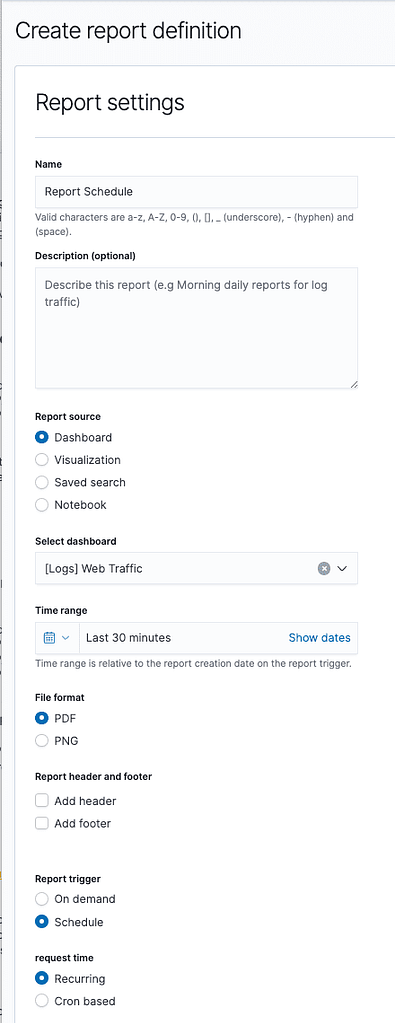
From here, users can generate reports on demand from a Dashboard, Visualization, Saved Search, or Notebook, selecting the time range of the report. For Dashboard, Visualization or Notebook, users can choose between PDF or PNG formats. For Discovery, users must choose CSV, with a maximum output of 10000 lines. Reports can be triggered either on demand or automatically based on a set schedule or a cron expression:
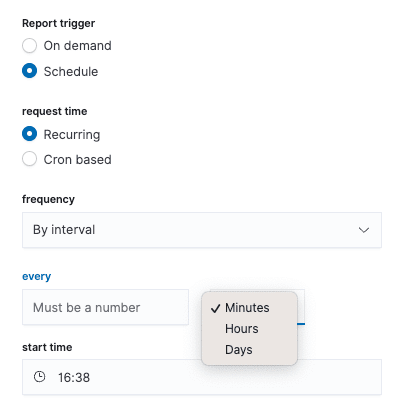
Then, set the frequency to daily or interval.
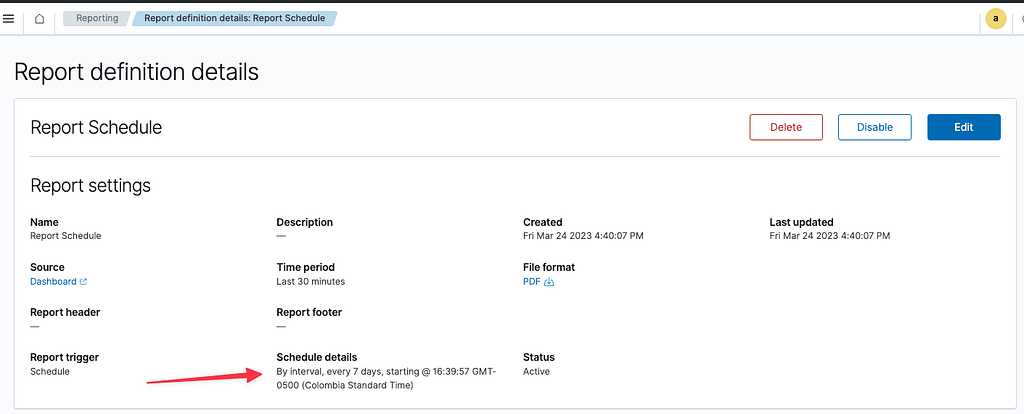
Once a schedule has been defined, the report definition details are visible from the Reporting home page.
Generating reports using the CLI Reporting Feature
In OpenSearch 2.5 it is also possible to use the new CLI Reporting feature discussed above.
Reporting CLI is a package that’s installed on a client server, external to the OpenSearch cluster that allows users to generate reports programmatically. For example, from consuming applications.
This is very powerful, because now OpenSearch reports can be easily triggered and sent from an external application .
Installation
The reporting CLI can be easily installed using the NPM package manager:
npm i @opensearch-project/reporting-cli -g
The reporting tool can be installed on any machine that can access the OpenSearch cluster, since it is independent of OpenSearch nodes.
Usage
First, get the URL of the dashboard that you want to generate the report:

Then, configure an SMTP server to use as the email source.
In this example, we use Gmail as the Email SMTP server provider. Users cannot use their current password for external access, they must create an App Password, and use it to login using their Gmail address.
Then, users can use the CLI to send a report via email:
opensearch-reporting-cli -u <your_dashboard_url> -a basic -c admin:admin -e smtp -s sender_email@gmail.com -r recipient_email@gmail.com -f png --smtpusername sender_gmail_username --smtppassword app_password --smtphost smtp.gmail.com --smtpport 465
Below are the main options:
| –url | The url of the dashboard users want to send in the report |
| –auth | type of auth (basic|cognito|none) |
| –credentials | user:password |
| –e | email transport mechanism (smtp|ses) |
| –from | email of sender |
| –to | email of recipient |
| –format | output format (pdfpng|csv) |
| –smtpusername | smtp username |
| –smtppassword | smtp password |
| –smtphost | smtp host |

*Be patient, it can take 1-2 minutes to generate and send the report.
The email will look like this:
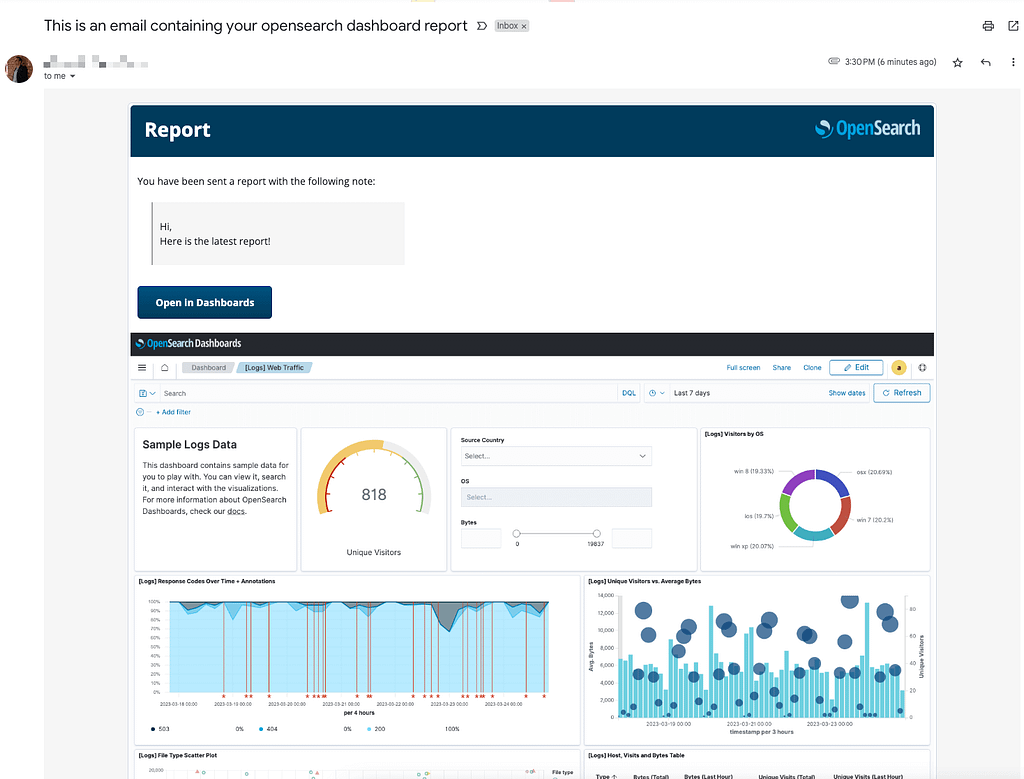
The report will come as an attached file, where the subject and note can be customized using the –subject, and –note options.
The full list of available options can be found by running the following command or here:
opensearch-reporting-cli -h
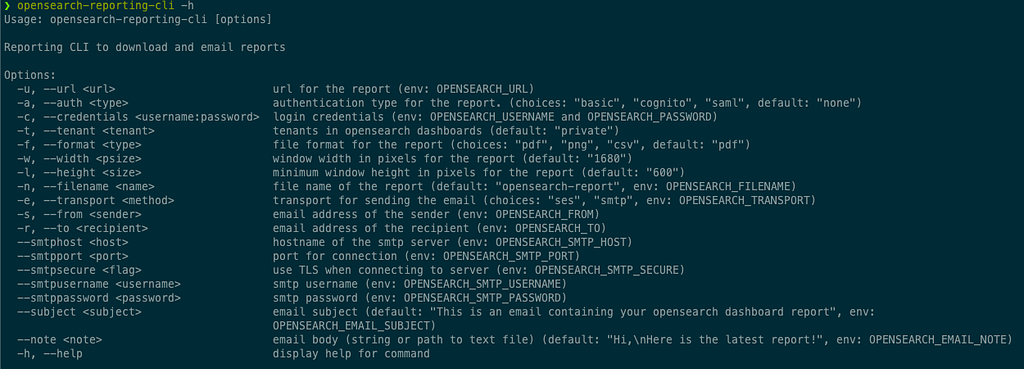
Example
Let’s create a simple API with Node.js that will receive an email address and send a report to that user. This way, instead of calling the CLI from a local machine, users can spin up a server and generate reports from an application, or call this API from another service.
Begin by creating a folder called reporting-cli, with a file called reporting-cli.js inside, that will act as a wrapper of the CLI library and enable execution from Node.js using javascript functions:
const { exec } = require('child_process');


function createReport(options) {
 const {
   url = "http://localhost:5601/goto/<your_id>\?security_tenant\=private",
   authType = "basic",
   credentials = "admin:admin",
   emailService = "smtp",
   smtpHost = "smtp.gmail.com",
   smtpPort = 465,
   smtpUsername = "<your_username>",
   smtpPassword = "<you_app_password>",
   sender = "<your_username@gmail.com>",
   recipient,
   format = "pdf",
 } = options;


 const command = `opensearch-reporting-cli -u "${url}" -a ${authType} -c ${credentials} -e ${emailService} -s "${sender}" -r "${recipient}" -f ${format} --smtpusername ${smtpUsername} --smtppassword ${smtpPassword} --smtphost ${smtpHost} --smtpport ${smtpPort}`;


 return new Promise((resolve, reject) => {
   exec(command, (error, stdout, stderr) => {
     if (error) {
       reject(error);
     } else {
       resolve(stdout);
     }
   });
 });
}


module.exports = { createReport };
To keep it simple, let’s keep all the parameters set within the function, but, remember, you can get as creative as you want passing those down via url.
Now let’s install Express, which will act as our server.
Run:
npm init
Press enter to accept the default options.
Then install express:
npm install express
Now create an index.js file, and add the following:
const express = require("express");
const app = express();
const port = 1337;


const { createReport } = require("./reporting-cli");


app.get("/", (req, res) => {
 res.send(
   "Welcome to the CLI generator for OpenSearch Reporting!, to go /report"
 );
});


app.get("/report", async (req, res) => {
 const { email } = req.query;


 if(!email){
   return res.send(`Please provide an email address`);
 }


 try {
   await createReport({ recipient: email });
   res.send(`Report successfully sent! to ${email}`);
 } catch (error) {
   res.send(`Whoops!, error ${error}`);
 }
});


app.listen(port, () => {
 console.log(`Example app listening on port ${port}`);
});
Finally, in the terminal run:
npm start
This should be visible in the console:
Example app listening on port 1337
Now, reports can be generated via your own API. Now, try using the browser.
Open your browser and go to: http://localhost:1337

Now, try using the /report endpoint: http://localhost:1337/report?email=some_email@domain.com
This will send a report to the email specified in the URL.
The success message will appear in the browser.
Remember, generating the report could take a while.

Now, we’re ready to check the email inbox:
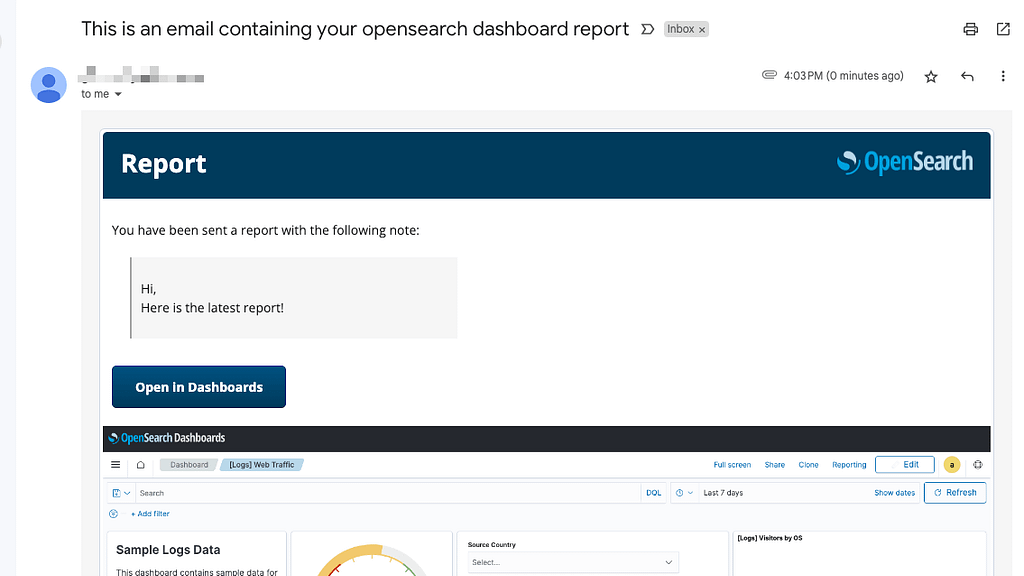
And the attached PDF file:
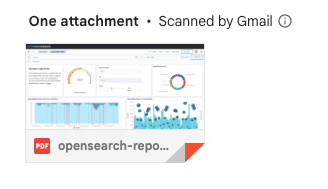
Perfect! Use this example to trigger reports from applications.
UPDATE: It is also possible to import reporting-cli as a nodejs package and use it, but it hasn’t been documented yet, check for updates: [FEATURE] nodejs package · Issue #36 · opensearch-project/reporting-cli (github.com)
Useful Information
Bear in mind:
- CSV reports are limited to 10000 lines. This limit is not currently configurable.
- Reports may take several minutes to generate, so be patient.
- Reports in general can put a high burden on OpenSearch, so be careful about how many users are allowed to create and schedule reports via either of the methods indicated.
Conclusion
OpenSearch offers multiple ways to generate reports from its dashboards and notebooks, including the Reporting Plugin and the Reporting CLI. The Reporting Plugin allows for on-demand report generation and automated report scheduling, while the Reporting CLI offers programmable report generation capabilities for integration with other applications
The OpenSearch Reporting CLI offers a powerful way to generate and send reports programmatically, allowing seamless integration within application flows.
With the ability to generate PNG images of Dashboards, CSV files, or full PDF reports, OpenSearch Reporting CLI provides users with valuable data summarizations.
By leveraging OpenSearch Reporting CLI, developers can enhance their applications, providing their users with easily accessible, customizable, and relevant reports.


